


In today’s connected world, having a private home internet network is essential for everyday life — from remote work and online learning to smart home automation and entertainment streaming. Setting up a secure and efficient network at home not only improves your internet performance but also protects your personal data and devices from unwanted access.
If you live in the USA, creating a private home network is easier than ever, thanks to modern technology and widespread broadband access. Whether you are setting it up for the first time or upgrading your existing connection, this guide explains how to set up a private home internet network, step by step.
What Is a Private Home Network?
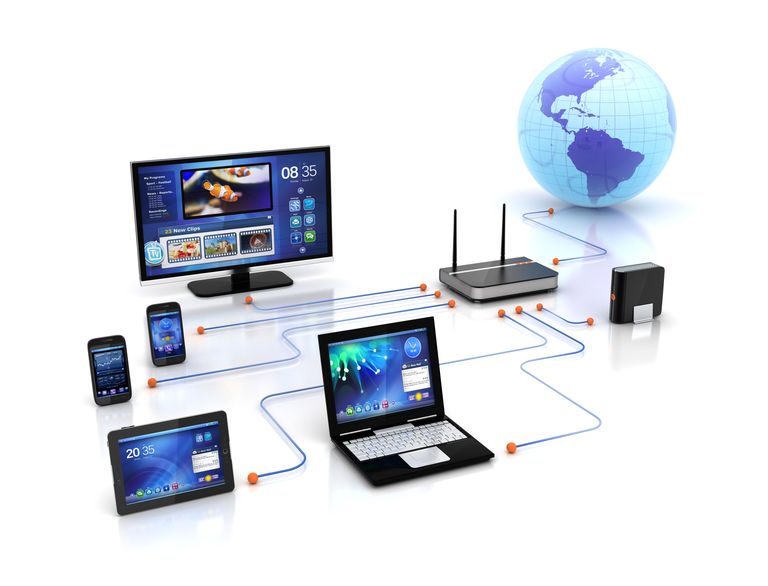
A home network is a system that connects all your internet-enabled devices — like computers, smartphones, TVs, and smart home gadgets — to one central connection.
When you make it private, it means only your authorized users and devices can connect. This keeps your data safe from outsiders while maintaining efficient performance inside your home.
Most home networks include two main parts:
- The modem, which connects your home to the internet through your Internet Service Provider (ISP).
- The router, which distributes that internet connection wirelessly or through wired connections to your devices.
Step 1: Choose the Right Internet Connection
Before setting up your private network, you need to decide on your internet connection type. The U.S. offers multiple options depending on your area:
- Fiber-optic: Fastest and most reliable, ideal for homes with heavy streaming or multiple devices.
- Cable: Common and widely available, offering good speeds at moderate prices.
- DSL: Uses telephone lines; suitable for areas with limited broadband options.
- Fixed wireless or 5G home internet: Uses cell towers to deliver internet, great for rural or mobile setups.
- Satellite: Best for remote regions without wired options.
When choosing your plan, think about the number of people and devices using the internet in your home, your average online activities (e.g., video calls, gaming, 4K streaming), and upload/download speed requirements.
Step 2: Get a Quality Router and Modem
If you rent equipment from your provider, you may already have a modem and router included. However, buying your own gives you more control, better performance, and long-term savings.
- Modem: Converts the internet signal from your ISP into a usable connection for your home.
- Router: Distributes that signal to multiple devices via Wi-Fi or Ethernet cables.
- Gateway device: A combination of both modem and router in one box.
When choosing equipment, look for routers that support the latest Wi-Fi standards like Wi-Fi 6 (802.11ax) or Wi-Fi 6E, which provide faster speeds and better coverage.
Also, make sure your modem is compatible with your ISP’s specifications. Most providers list supported models on their websites.
Step 3: Place Your Router in an Optimal Location
Router placement plays a huge role in your network’s performance. To maximize coverage and minimize interference, follow these tips:
- Place your router in a central location in your home.
- Avoid putting it near metal surfaces, thick walls, or inside cabinets.
- Keep it elevated, such as on a shelf or desk.
- If your home is large or multi-story, consider using Wi-Fi mesh systems to extend coverage evenly.
A good signal layout ensures all devices — from your living room TV to your upstairs office — get strong and stable connectivity.
Step 4: Secure Your Home Network
Security is the foundation of a private home network. Without protection, your Wi-Fi could be accessed by strangers or hackers. Here’s how to secure it properly:
- Change the default SSID (Wi-Fi name) — Avoid names that reveal personal details, such as your address or last name.
- Use a strong password — Choose a long and complex passphrase combining letters, numbers, and symbols.
- Enable WPA3 encryption — It’s the most secure wireless encryption standard currently available.
- Disable WPS (Wi-Fi Protected Setup) — Though convenient, it can make your network vulnerable to unauthorized access.
- Keep firmware updated — Router manufacturers often release updates to patch security issues.
- Use guest networks — If visitors need internet access, set up a separate guest Wi-Fi network so they don’t access your main devices.
A few minutes spent on security setup can save you from major privacy and data risks later on.
Step 5: Connect Your Devices
Once your router is live and secure, start connecting your home devices.
- Wired devices: Use Ethernet cables for desktops, gaming consoles, or TVs that need stable connections.
- Wireless devices: Connect laptops, smartphones, and tablets via your Wi-Fi SSID.
- Smart home gadgets: Follow the manufacturer’s instructions — some may require a specific frequency (e.g., 2.4GHz).
When connecting, label your devices using unique names so you can easily monitor them in your router’s control panel later.
Step 6: Manage and Monitor Your Network
Modern routers come with easy-to-use mobile apps or web interfaces that allow you to manage your network.
Here’s what you can do with them:
- Monitor bandwidth usage for each device.
- Prioritize traffic for work devices or streaming.
- Set parental controls for safe internet use.
- Schedule Wi-Fi hours to save energy and limit access.
- Run speed tests to ensure your ISP delivers the promised speed.
Regularly monitoring your network keeps it efficient and helps identify issues before they cause disruptions.
Step 7: Add Advanced Features for Privacy and Control
If you want to take your private home network to the next level, consider these optional enhancements:
- VPN Integration: Some routers let you set up a virtual private network to encrypt all home traffic.
- Network Attached Storage (NAS): Create a private cloud for secure file sharing across devices.
- Smart home hub integration: Connect IoT devices like lights, thermostats, and security systems seamlessly.
- Firewall and intrusion detection systems: Add extra protection for sensitive data.
These tools enhance privacy, security, and control — ideal for tech-savvy users or home offices.
Common Troubleshooting Tips
Even with a great setup, occasional issues may arise. Here are quick fixes for common problems:
- Slow speeds: Reboot your modem/router, or check for background apps using high bandwidth.
- Connection drops: Update firmware or change the Wi-Fi channel to reduce interference.
- Weak signal: Move your router or use Wi-Fi extenders.
- Device won’t connect: Double-check passwords and ensure the right frequency (2.4GHz or 5GHz).
If issues persist, contact your provider’s support for diagnostic help.
Final Thoughts
Setting up a private home internet network in the USA doesn’t require technical expertise — just careful planning and attention to security. From choosing the right connection type to optimizing your router placement and managing your devices, every step contributes to better performance and stronger protection.
A well-designed home network ensures smooth video calls, fast downloads, reliable streaming, and peace of mind knowing your data is safe.
By following these steps, you’ll have a secure and efficient internet setup that supports your work, family, and digital lifestyle — now and in the future.